
Back
Deleting a Snapshot
This page explains how to delete a snapshot from the Xen Orchestra management screen.
Deleting User-created Snapshots
1. Open the target virtual machine
Select “VMs” from the “HOME” menu to display a list of virtual machines. Click the virtual machine you want to delete the snapshots for from the list.
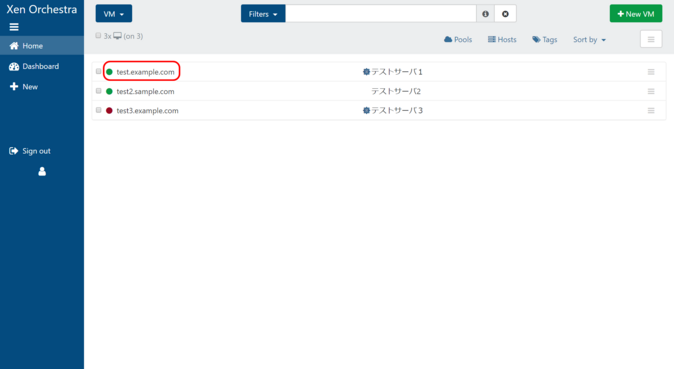
2. Delete your snapshots
Open the Snapshots tab.
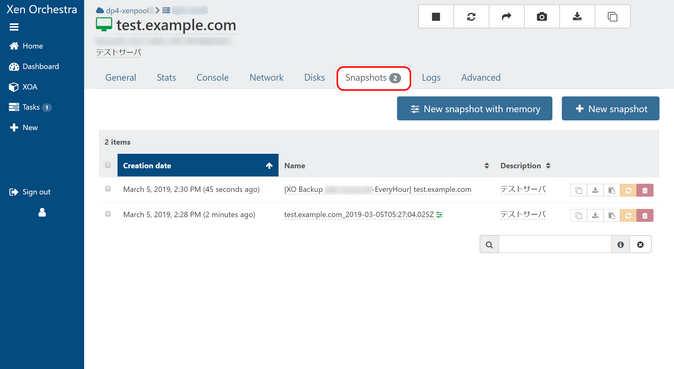
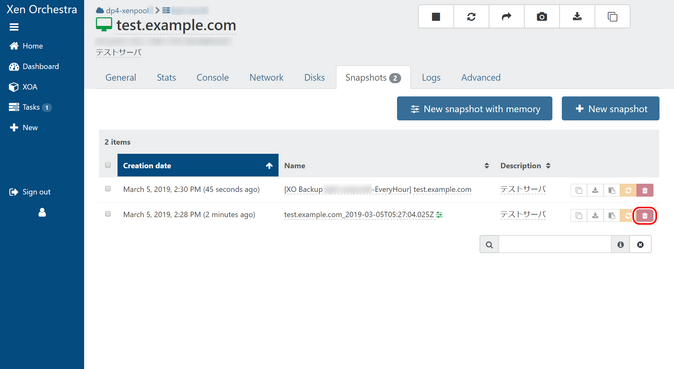
Check the snapshot name and creation date, and if there are no problems, click the trash icon (Remove this snapshot).
*Do not delete snapshots created automatically by the system (those with [XO Backup …] at the beginning of the name).
Removing Snapshots That Have Not Been Properly Deleted by The System
Snapshots created by users or automatically generated during backups may not be properly deleted and remain internally. In many cases, this is thought to be the result of the above merging process, where something that should have been deleted was not deleted even after the merging process was completed. The difference disk images for snapshots that were not properly deleted often lose their association with the virtual machine, so they do not appear in the snapshot list on the virtual machine management screen.
These remaining differential disk images also take up space in the local storage, so you may need to check the list of local storage disks to see if there are any snapshots that were not properly deleted and delete them.
Deletion Criteria
Open the storage from the storage list and delete unnecessary snapshots from the “Disks” tab. When deleting unnecessary snapshots, please check the following two points.
- It is a snapshot (the name has a camera icon)
- The “VMs” column is empty (this is a snapshot that is not associated with a virtual machine)
- Note
- If a backup process is running on the system during this operation, it may interfere with the process of merging the differential disks. Therefore, it is recommended that you exclude the VM in question from the backup targets before proceeding.
- In principle, disks that are in use (operating) are “locked” by the system, so disks of currently operating VMs cannot be deleted. Therefore, disks that can be deleted here are considered to be those that are not currently being used, but since this is a “disk deletion operation,” we recommend that you take into consideration the unlikely event that this occurs and take minimal measures to protect your data using a method other than this system. (For example, transfer files to another server, copy a DB dump to another server, etc.)
1. Open the target local storage
Select “Storages” from the “HOME” menu to display a list of storage devices. Click the storage device from the list for which you want to free up space.

2. Delete your snapshots
Open the “Disks” tab.
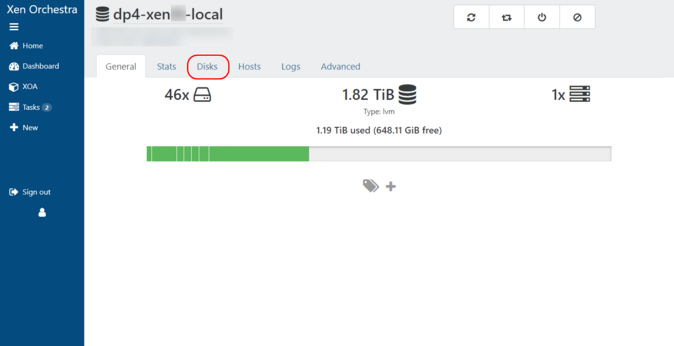
Check the snapshot name and if there are no problems, click the trash can icon (Delete selected VDI).
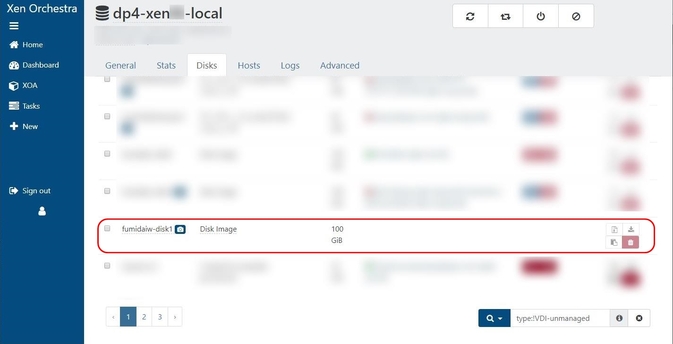
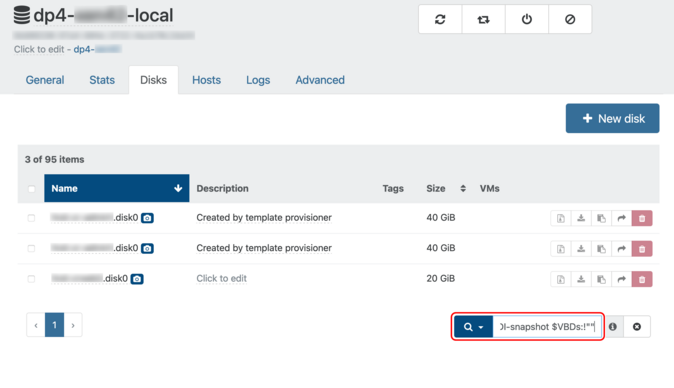
If you have a large number of these anonymous snapshots, you can narrow them down by entering the following in the search bar at the bottom right, and then safely delete them.
type:!VDI-unmanaged type:VDI-snapshot $VBDs:!""
Consolidating Deleted Snapshots
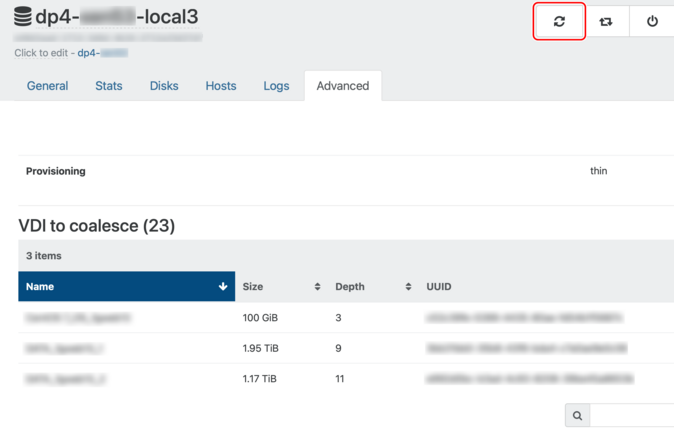
Snapshot coalescing is done automatically and can be seen in the Advanced tab.
The higher the Depth count, the more likely it is that the snapshot backing store has not yet been consolidated. The consolidation process begins immediately after the snapshot is deleted, and can be forced with the Rescan button, but only one consolidation process is performed per storage. If the Depth does not decrease, you can force it with the Rescan button, but since it is generated every time replication is performed, the backup frequency may be too short. To change the backup frequency, please contact our support or sales representative.

 Japan
Japan Korea
Korea China
China Taiwan
 Vietnam
 Thailand
 Indonesia
 Portugal
 Spain
Spain France
 Germany
 Egypt
Egypt Russia
